Helix Ultimate allows you to build Mega Menu on your Joomla website with ease to help your site be more navigable. It offers you different layouts to give diverse looks of your menus. In this article, we will give you detailed instructions on how to set up Mega Menu Builder. Let’s go!
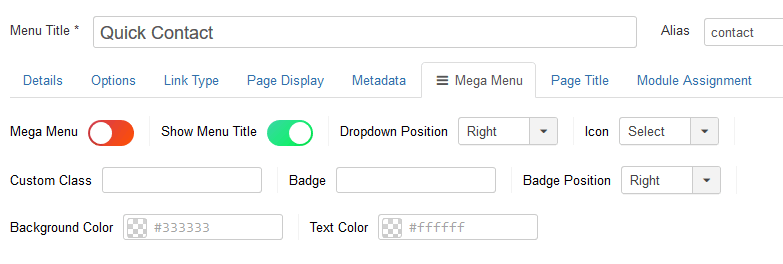
The first think you need to do is to click on the “=Mega Menu” tab ( this tab came from Helix Ultimate Framework). You will see several switchers, responsible for additional features.
Image by Joomshaper
Mega Menu
Now you can create highly customized and creative mega menu configurations by enabling/ disabling advanced Mega Menu options.
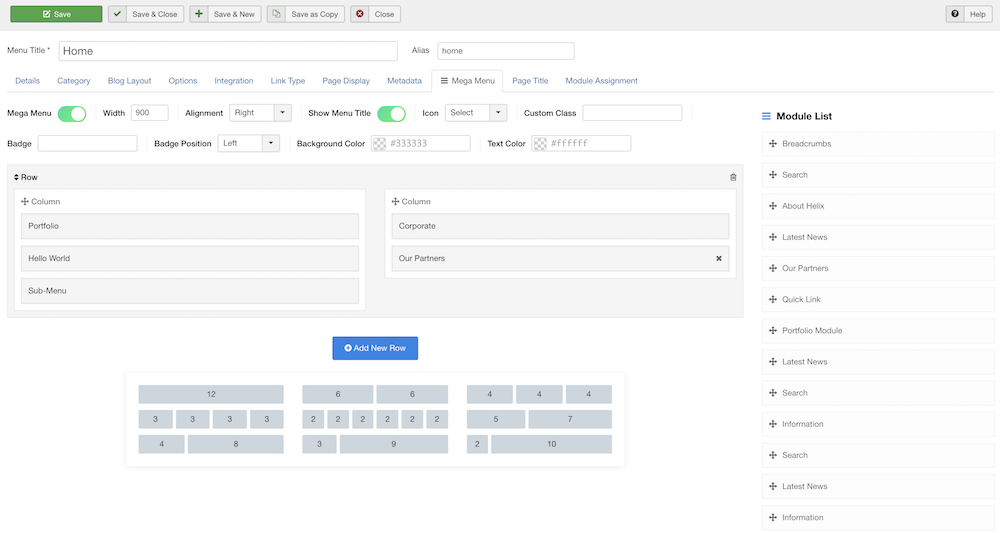
Add and use row and column based menus, also drag and drop the modules to the menu positions from the modules list.
Width – set total width of submenu area.
Alignment – allows you to choose submenu area alignment ( right, left, center, or set full width).
You can easily build a two or three columns sub-menu from Menu Manager. Use “Menu Heading” or “External Links” menu type to build main submenu headers.
A step by step guide to building columns for menu items using Mega Menu:
Click “Add New Row” button ( blue button).
Select Menu layout: There are 9 options for you to choose from. You can choose single row or rows with columns.
Click “Save” button to refresh/rebuild content. You will see submenu items, if were added before.
Using drag and drop function to arrange columns, move elements or modules into another position, from one column into another. It also allows you to select existing module(s) from the right sidebar and put into column.
Remove undesired row by using trash icon.
Remove undesired element by clicking on “X” icon.
Don’t forget to save all changes by clicking on the “Save” or “Save & Close” button.
Image by Joomshaper
Show Menu Title
This option allows you to hide Menu Title from menu, but alias in system will stay. It is useful when you want to create hidden menu item for short url or show only icon instead full menu item name, for Home or Search position.
Dropdown position
Use this option to change dropdown submenu position.
Menu Icon
Mega Menu allows you to set an icon for each menu item in your menu to favor a quick visual option identification. By default, the icon will be displayed to the left of the menu item text. If you want to remove the icon, just select the “Select” name adn save. (You can use font icons based on Font Awesome v4.7 ( a huge collection of icons)).
Custom Class
When your template has a particular menu location and it needs adjustment, the use of this field is necessary. You can place any necessary custom class name which is already defined inside your Custom CSS code section here. If you ass more than one class name, then they have to be separated with space.
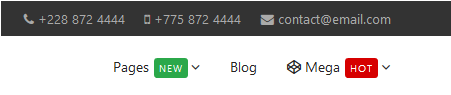
Badge in menu items
Helix Ultimate allows you to highlight your menu item(s) with name badges to draw your visitors’ attention to any menu item.
Image by Joomshaper
Badge Position – set badge name position to the right or to the left.
Background Color – set the background color for the badge item only.
Text Color – set the color for the badge item only. You should use different color than used for background color to keep necessary contrast.
That’s all! Hope you find this article useful for you. If you have any question about this tutorial, don’t hesitate to leave a comment below. And don’t forget to share with your friends if you find it useful! Thanks! ?
We’re a Digital Team from EngineTemplate with 5 content experts. Our team has 5 years exp in open source Joomla and WordPress, we make daily blogs and build useful resources for everyone who is having issues with open source while using it.
Interesting with this topic? You can read related articles:
Hi
can anyone help with setting up the mobile menu for helix ultimate template i have a mega menu on the desktop but my mobile menu wont work https://www.islamicmessages.co.za
This website uses cookies so that we can provide you with the best user experience possible. Cookie information is stored in your browser and performs functions such as recognising you when you return to our website and helping our team to understand which sections of the website you find most interesting and useful.
Strictly Necessary Cookies
Strictly Necessary Cookie should be enabled at all times so that we can save your preferences for cookie settings.
If you disable this cookie, we will not be able to save your preferences. This means that every time you visit this website you will need to enable or disable cookies again.
Flash Sale!Get35% OFFfor your purchase on today! Coupon code: FLASHSALE35Redeem Now
Flash Sale!Get35% OFFfor your purchase on today! Coupon code: FLASHSALE35Redeem Now


Hi
can anyone help with setting up the mobile menu for helix ultimate template i have a mega menu on the desktop but my mobile menu wont work
https://www.islamicmessages.co.za
Make sure that you already create Menu module and set it at position ‘offcanvas’.
Hi Kelvin
i have but still having the same problem
Thanks